


Views: 0 Author: Site Editor Publish Time: 2026-07-23 Origin: Site


The growing shift toward grout-free, rapid-install surface finishes makes PVC Wall Panels a primary choice for residential renovations. Long-term performance relies entirely on strict adherence to installation protocols. Improper installation—such as failing to account for thermal expansion, inadequate substrate preparation, or incorrect adhesive selection—results in panel warping, moisture ingress, and costly delamination. When water breaches a poorly sealed joint in a wet area, the underlying wall structure suffers severe rot and mold damage long before the issue becomes visible on the surface. This guide breaks down the technical requirements, structural methodologies, and step-by-step execution necessary to install PVC wall cladding securely. By following these field-tested techniques, you ensure a waterproof, dimensionally stable finish that stands up to daily wear and tear.
Substrate Readiness is Non-Negotiable: Panels can be installed over existing tiles or drywall, provided the surface is plumb, degreased, and structurally sound; otherwise, a batten (keel) system is required.
Thermal Expansion Requires Tolerances: PVC expands and contracts with temperature fluctuations; failing to leave adequate perimeter gaps will cause buckling.
Adhesive and Fastener Selection Dictates Lifespan: High-grab, solvent-free panel adhesives, mechanical fasteners (cladding screws/staples), and sanitary-grade silicone are mandatory for structural integrity, especially on ceilings and in wet zones.
Precision Cutting Prevents Waste: Utilizing fine-tooth saws and scoring techniques minimizes chipping and ensures clean integration with corner profiles and trims.
Establishing the baseline requirements for a successful installation focuses on wall plumbness, moisture levels, and load-bearing capacity. A wall that is significantly out of plumb causes the interlocking grooves to misalign as you progress across the room. Use a 72-inch spirit level or a self-leveling laser to check for high spots and dips across the entire surface area. Address any structural dampness before proceeding. Trapping moisture behind waterproof panels accelerates wall deterioration, rotting timber studs and degrading drywall integrity. You must verify that the wall can support the combined weight of the panels and adhesive, especially when working with thicker, solid-core materials.
Choosing the correct mounting method depends entirely on the condition of your existing walls. You cannot force a flat panel onto a heavily bowed wall without compromising the interlocking seams.
Installation Method | Ideal Substrate Conditions | Key Advantages | Primary Limitations |
|---|---|---|---|
Direct Adhesion | Flat, dry, porous, or properly keyed surfaces (drywall, plaster, secure tiles). | Faster installation, maximizes room space, requires fewer materials. | Fails on damp or uneven walls; requires extensive surface prep. |
Batten (Keel) System | Uneven walls, damp surfaces, or when routing pipes/wires. | Creates a perfectly plumb surface, allows airflow behind panels. | Reduces room dimensions slightly, requires more labor and framing materials. |
When utilizing timber or metal keels, spacing intervals typically range from 300mm to 400mm centers. This spacing provides adequate support and prevents panel flex when pressure is applied to the finished wall. Always use treated timber for battens in wet areas to prevent rot.
Installing directly over existing ceramic tiles without tile removal saves significant time and mess. First, thoroughly degrease the tiles using a heavy-duty trisodium phosphate (TSP) cleaner or a specialized degreaser. Soap scum and body oils act as a barrier, preventing panel adhesive from bonding. Test for loose tiles by tapping them lightly with the handle of a screwdriver; any hollow-sounding tiles must be removed and the resulting void filled with a rapid-setting cement compound. If the tile surface is highly glazed, lightly scuff it with 80-grit sandpaper to provide a mechanical key for the adhesive.
Check existing tiles for blown grout and test drywall for moisture content using a pinless moisture meter. Readings above 15% indicate an underlying moisture issue that requires immediate remediation. If the drywall is excessively damp, identify and fix the leak source—whether it is a weeping pipe or exterior penetration—before installation. Apply necessary acrylic primers to highly porous surfaces, like fresh plaster or bare drywall. Unprimed porous surfaces absorb the moisture from the panel adhesive too quickly, flashing off the bonding agents and severely weakening the hold.
A strict technical requirement is resting the panels flat in the installation room for 24 to 48 hours prior to fitting. This equalizes the material temperature with the room's ambient temperature. PVC reacts to temperature changes; installing cold panels in a warm room leads to post-installation expansion that pops seams or buckles the cladding. Keep the panels stacked horizontally on a flat surface to prevent bowing during the acclimation period.
Breaking down the required equipment into measurement, cutting, adhesion, and finishing categories ensures you maintain workflow momentum without stopping to source missing items.
Measurement and Layout: Tape measure, framing square, 72-inch spirit level, self-leveling cross-line laser, and a chalk line.
Cutting Equipment: Fine-tooth hand saw (minimum 14 TPI), circular saw with a 60-tooth plastics blade, jigsaw for penetrations, and a heavy-duty utility knife.
Adhesion and Fastening: Heavy-duty caulking gun, solvent-free grab adhesive, sanitary silicone, 18-gauge brad nailer or heavy-duty staple gun, and stainless steel cladding screws.
Finishing Tools: Silicone smoothing tools, masking tape, and a non-abrasive cleaning cloth.
Accurate cuts require the right tools and techniques. Use fine-tooth hand saws or circular saws equipped with fine-tooth blades designed for plastics or non-ferrous metals. Always cut with the decorative side facing up when using a hand saw, but face down if using a circular saw or jigsaw. The teeth of a circular saw cut on the upward stroke, which causes tear-out on the face if oriented incorrectly. Utility knives work well for scoring and snapping thinner panels along straight lines. Laser levels and framing squares ensure your starting lines are perfectly vertical and horizontal, which dictates the alignment of the entire wall.
Selecting the correct chemical and mechanical fixings guarantees longevity. Evaluate solvent-free versus solvent-based grab adhesives carefully. Solvent-free options are mandatory; solvent-based adhesives cause adverse chemical reactions that melt or warp the PVC backing, leading to catastrophic failure. Mechanical fasteners include stainless steel cladding screws, drywall screws, and heavy-duty staples. These secure the panel's nailing fin directly to the battens or wall studs. Sanitary-grade, mold-resistant silicone is mandatory for wet-area joints, sealing bottom edges, and bridging gaps around plumbing fixtures.
Select the correct extrusion profiles to manage exposed edges and expansion gaps. J-trims act as end caps at the top and bottom of the installation. H-trims join panels end-to-end if the wall height exceeds the panel length. Internal and external corner profiles provide clean transitions around room perimeters and window reveals, while ceiling coving hides the upper expansion gap and accommodates structural movement.
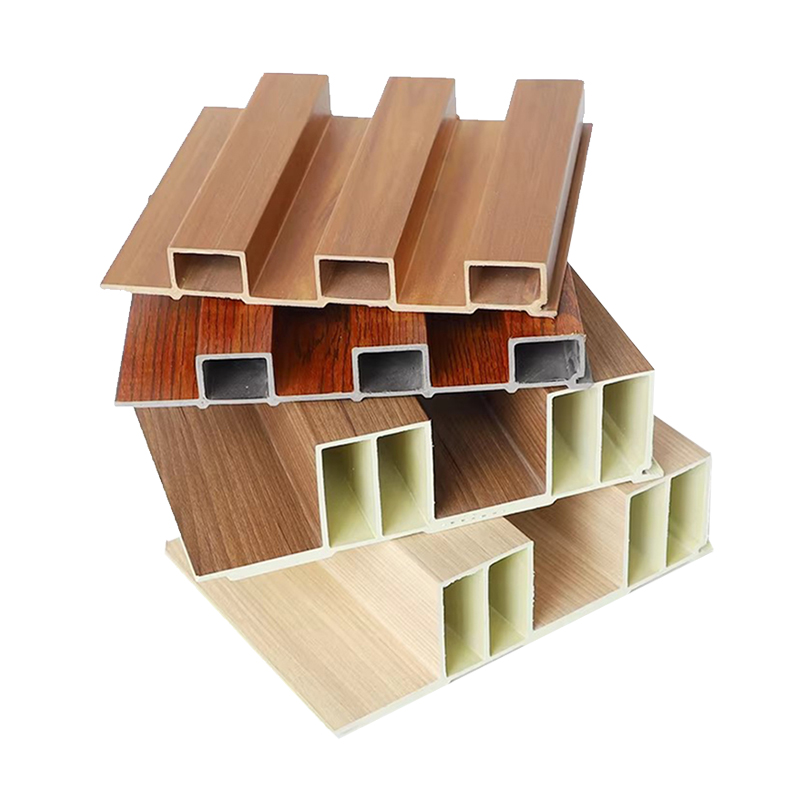
Begin by degreasing the substrate and removing protruding elements like old nails, screws, or flaking paint. Establish a true vertical starting line using a laser level. Do not rely on room corners being plumb. If using a keel system, mount the horizontal or vertical battens securely to the wall using masonry anchors or wood screws. Shim the battens where necessary to create a perfectly flat plane across the entire wall surface. Check the plane repeatedly with a long straight edge.
Measure the wall height in several places, as floors and ceilings are rarely perfectly level. Cut the panels to length, intentionally leaving a 2-3mm expansion gap at both the floor and ceiling. This gap allows the material to expand during warmer months without buckling. Use the appropriate cutting technique based on your tool selection to prevent chipping the decorative face. Sand any rough cut edges lightly to ensure they seat fully into the trim profiles.
Secure the starting corner profiles and J-trims using adhesive or mechanical fasteners. Place the first panel with the tongue facing the starting wall and the groove (nailing fin) facing the direction of progression. Apply adhesive to the back of the panel in a serpentine pattern or heavy-dot grid for direct adhesion. Press the panel firmly into the starting trim and against the wall. Mechanically fasten the nailing fin to the battens or wall studs using staples or screws spaced every 300mm.
Slide the tongue of the next panel into the groove of the previous one. Ensure the seam is tight, flush, and visually seamless. Drive screws or staples through the rear tongue flange into the battens before gluing the face of the next panel. This combination of mechanical fastening and adhesive provides maximum stability. Wipe away any adhesive squeeze-out immediately before it cures.
Overhead ceiling installations require gravity-defying support systems. Always use mechanical fasteners in addition to adhesive on ceilings. Work perpendicular across the ceiling joists or battens, ensuring each panel is fully supported before moving to the next. Use specific ceiling coving profiles to handle wall-to-ceiling transitions neatly, allowing for the necessary expansion gaps at the perimeter.
Use hole-saw techniques for plumbing pipe protrusions. Cut the hole 3-4mm larger than the pipe diameter to allow for thermal expansion. For electrical outlets, measure carefully and use a jigsaw to cut precise rectangular openings. Maintain structural integrity around windows by using appropriate edge trims and sealing the perimeter thoroughly with silicone to prevent draft and moisture ingress.
Shower enclosures and bathroom walls require secondary waterproofing measures beyond the panel's interlocking mechanism. Water migrates through microscopic gaps via capillary action. Relying solely on the dry click-lock system in direct water contact areas guarantees eventual moisture ingress behind the cladding.
Apply a continuous 2mm bead of sanitary silicone inside the groove of the panel before inserting the next panel. As the panels interlock, the silicone compresses and spreads, creating a primary, moisture-impervious barrier within the joint itself. Wipe away any excess squeeze-out on the decorative face immediately with a smoothing tool or a cloth dampened with mineral spirits. Do not let the silicone cure on the panel face.
Utilize clad-seal strips or specialized base profiles to bridge the gap between the cladding and the shower pan or bathtub. These profiles feature a flexible rubber lip that directs water back into the tray. Fill the channel of the base profile with silicone before seating the panel into it. This prevents capillary action, where water is drawn up behind the panel, leading to hidden mold growth and structural rot.
Calculate and leave appropriate expansion gaps behind trims to accommodate seasonal temperature shifts. If panels are fitted tight against adjacent walls, floors, or ceilings, the natural expansion causes them to buckle outward, breaking the adhesive bond and ruining the wall plane. Always leave a minimum 2-3mm gap at all rigid boundaries.
Over-tightening mechanical fasteners through the nailing fin restricts thermal movement. Drive screws in until the head is just flush with the plastic; do not crush or distort the flange. If using staples, ensure the pressure setting on the compressor does not drive the staple completely through the plastic. Allowing slight lateral movement prevents localized warping around the fastener points.
Panel detachment usually stems from dusty substrates, expired adhesives, or inadequate curing times. Always prime dusty walls and vacuum the area thoroughly before applying adhesive. Check the expiration date on all adhesive tubes. Allow a minimum 24-hour dry time before exposing the panels to moisture, heavy use, or extreme temperature changes.
Correct off-plumb installations early. Check plumb with a spirit level every three panels. If the wall starts leaning, adjust the panel slightly within the groove tolerance before fastening. Forcing a severely bowed panel into a groove compromises the entire wall system, leading to seam separation, visible gaps, and water ingress down the line.
Comparing these panels against ceramic tiles and acrylic sheets reveals distinct advantages for residential decision-making. Tiles offer traditional aesthetics and extreme surface hardness but require intensive labor, specialized cutting tools, and messy wet trades. Acrylic sheets provide a seamless look but are rigid, difficult to transport, and require perfectly flat walls for installation.
The reduction in man-hours is significant. There is no mortar mixing, no troweling, no grouting, and no waiting for materials to cure before sealing. A standard bathroom can be paneled in a single day compared to three or four days for tiling. This rapid installation offsets the upfront material costs, making it a highly efficient solution for fast-turnaround renovations and property flips.
Assess the impact resistance based on the core structure. Solid-core panels withstand blunt impacts better than hollow-core variants, making them suitable for high-traffic areas. The reality of maintaining a grout-free surface means no scrubbing moldy grout lines or reapplying sealers. Maintenance requires only a simple wipe-down with warm water and non-abrasive household cleaners to maintain the original finish.
Calculate your required square footage and add a 10% overage margin to account for waste and complex cuts around fixtures.
Order physical samples to test structural rigidity and verify color matching under your specific room lighting conditions.
Source appropriate solvent-free adhesives, mechanical fasteners, and matching trim profiles before beginning any demolition work.
Acclimate all panels in the installation room for 48 hours to equalize material temperature and prevent post-installation warping.
A: Yes, provided the existing tiles are firmly attached, flat, and thoroughly degreased. Loose tiles must be removed and the gaps filled with rapid-set cement. Lightly sanding highly glazed tiles with 80-grit sandpaper improves the adhesive grip significantly.
A: The nailing fin is the extended, perforated flange on the groove side of the panel. You drive stainless steel screws or heavy-duty staples through this fin directly into the wall studs or battens to secure the panel before interlocking the next one.
A: Yes. Ceiling installations require mechanical fasteners driven into ceiling joists or timber battens in addition to solvent-free adhesive. This dual-fastening approach counteracts gravity and prevents the panels from sagging over time.
A: Use a fine-tooth hand saw or a circular saw equipped with a 60-tooth plastics blade. Cut slowly to avoid friction buildup that melts the plastic. Score and snap thinner panels using a sharp utility knife and a metal straight edge.
A: Yes, you must use a high-grab, solvent-free panel adhesive. Solvent-based adhesives chemically react with the PVC material, causing it to melt, warp, or fail to adhere properly to the substrate.
A: Leave a 2-3mm expansion gap at both the floor and ceiling, as well as in the internal corners. This gap accommodates thermal expansion and is typically hidden by J-trims, ceiling coving, or baseboards.


